

Photo by Kevin CASTEL on Unsplash
Deploying Iris Classification Model with XGBoost: Free, Instant Updates with PyScript Deployment


Introduction
Welcome to an exciting journey into deploying machine learning models with ease and efficiency! In this blog post, we'll explore how to deploy an iris classification model, built using the powerful XGBoost algorithm, for free and with instant updates. By leveraging PyScript deployment and version control, we'll ensure seamless deployment and maintenance of our machine learning model.
GitHub repo for this project: https://github.com/LakshmanKishore/irisClassification
Live application link: https://lakshmankishore.github.io/irisClassification/
Understanding the Iris Dataset
The Iris dataset comprises samples of iris flowers, each with four features: sepal length, sepal width, petal length, and petal width. Our objective is to classify each iris sample into one of three species: Setosa, Versicolor, or Virginica.
Why XG Boost?
You might wonder why I chose XGBoost for this project. Well, it all started when I encountered some trouble loading a pkl file while using PyScript. But when I revisited PyScript after a few months, I was impressed by its progress. Still, I hesitated due to the pkl file issue. However, a Data Scientist friend mentioned that XGBoost allows storing models in a JSON format. Intrigued by the possibility of deploying machine learning models for free on the web using PyScript and knowing that deployment for static sites is free, I decided to give XGBoost a try.
Integrating Data Science Lifecycle
In the realm of data science, every project follows a lifecycle, from data collection to model deployment. While solving the Iris problem and deploying the model with version control, you're essentially completing several stages of this lifecycle.
Data Collection & Preparation:
In the case of the Iris problem, the dataset was readily available, simplifying the data collection process. However, data cleaning and preprocessing might still be necessary to ensure accurate model training.
Model Building & Evaluation:
Choosing XGBoost showcased the experimentation phase, testing different algorithms and techniques. By evaluating the model's performance, desired accuracy levels were ensured.
Deployment & Maintenance:
Deploying the model with PyScript and version control (Git/GitHub) represented the deployment and maintenance phase, allowing for easy updates and improvements to the model over time.
Let's get started!
The folder structure consists of:
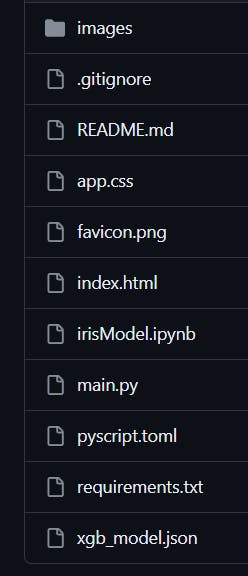
Images: Contains images used in the HTML page.
.gitignore: Specifies files and directories to be ignored by Git.
README.md: Provides information about the project, typically used for documentation.
app.css: Contains custom CSS styles applied to the HTML page for design purposes.
favicon.png: Image used for the page title.
index.html: HTML file containing tags for structuring the webpage. It includes a submit button that triggers a Python function defined in main.py.
irisModel.ipynb: Jupyter notebook file containing the model development process.
main.py: Python script containing logic to load the xgb_model.json file and the XGBoost model for production use.
pyscript.toml: TOML file specifying the download process for the model and required packages such as XGBoost and pandas.
requirements.txt: Text file listing all required packages for building the model.
This folder structure organizes the project components for easy navigation and development. Feel free to explore the files to gain a deeper understanding of the project.
Live Application

The initial screen displays a simple linear gradient background with text introducing the application. It includes input boxes to collect prediction data and a submit button to trigger the prediction method of the loaded model. During the first launch of the application, PyScript sets up a virtual environment and downloads Pyodide, which may cause initial delays. Subsequent uses of the application will be faster as cached data is utilized.
Main Code Snippet
<button py-click="get_predictions()" class="btn btn-primary">Submit</button>
Explanation:
- py-click Attribute: This attribute specifies a Python function to be executed when the button is clicked. In our case, the
get_predictions()function from our main.py file is called when the button is clicked. This function collects input data from the user, makes predictions using the loaded machine learning model, and updates the webpage with the predicted class and corresponding iris flower image.
import xgboost as xgb
import pandas as pd
from pyscript import Element
from js import document, window

classes = ["SETOSA","VERSICOLOR","VIRGINICA"]

loaded_model = xgb.Booster()
loaded_model.load_model("xgb_model.json")

def get_predictions():
    try:
        sl = float(Element("sl").value)
        sw = float(Element("sw").value)
        pl = float(Element("pl").value)
        pw = float(Element("pw").value)
    except:
        # window.alert("Please Enter valid values!")
        return 0

    sample_test_record = pd.DataFrame([{
        'sepal length (cm)': float(Element("sl").value),
        'sepal width (cm)': float(Element("sw").value),
        'petal length (cm)': float(Element("pl").value),
        'petal width (cm)': float(Element("pw").value)
    }])
    prediction = loaded_model.predict(xgb.DMatrix(sample_test_record))

    predicted_class = classes[int(prediction.argmax())]
    document.querySelector("#iris_image").src = f"./images/{predicted_class}.png"
    document.querySelector("#prediction_result").innerHTML = f"The iris flower for the input data is : <b>{predicted_class}</b>"

    return predicted_class
Explanation:
Import Libraries: We import necessary libraries including
xgboostfor loading the pre-trained model,pandasfor data manipulation, andElementanddocumentfrompyscriptandjsrespectively for interacting with HTML elements.Load Pre-trained Model: We load the pre-trained XGBoost model from the saved JSON file (
xgb_model.json) usingxgb.Booster().Define Prediction Function: The
get_predictions()function extracts input values from HTML input boxes, creates a DataFrame with the input values, makes predictions using the loaded model, determines the predicted class based on the highest probability, and updates HTML elements with the predicted class and corresponding image.Handle Exceptions: We handle exceptions for invalid input values to ensure smooth functioning of the application.
packages = ["xgboost", "pandas"]
[[fetch]]
from = 'https://raw.githubusercontent.com/LakshmanKishore/irisClassification/main/xgb_model.json'
name = "Iris XGBoost"
Explanation:
packages: This section specifies the Python packages required for running your application. In this case, the "xgboost" and "pandas" packages are listed, indicating that PyScript will ensure these packages are available in the runtime environment.
[[fetch]]: This section defines a fetch operation, which instructs PyScript to download resources from a specified URL. In this case, it's fetching the "xgb_model.json" file from a GitHub repository. This file likely contains the pre-trained XGBoost model for iris classification.
from: Specifies the URL from which to fetch the resource.
name: Provides a name for the fetched resource. In this example, it's named "Iris XGBoost".
This configuration ensures that the necessary Python packages are available and that the pre-trained XGBoost model is downloaded and ready for use in your application.
Version Control Integration
Git and GitHub provide essential tools for managing our machine learning model's versions and updates. By committing and pushing model changes to our GitHub repository, we ensure accessibility and collaboration among users. PyScript fetches the latest model version directly from GitHub, ensuring seamless integration and availability for all users. This streamlined approach enhances reliability and facilitates continuous improvement of our machine learning solution.
Conclusion
In this blog post, we've explored building and deploying a robust iris classification model using XGBoost and Python scripting. By leveraging PyScript deployment and version control with Git and GitHub, we ensure seamless updates and accessibility for all users. With the fundamentals mastered, we're ready to tackle more complex machine learning challenges.
Happy coding and happy blogging!!